DocsGet started
Installation
Bud Decision Studio is a desktop app for Windows, macOS and Linux. Setup checks your computer, installs the engine that runs the models, and then lets you choose which models to download. Nothing else needs to be installed first.
What your computer needs#
| Supported | |
|---|---|
| Windows | Windows 10 or 11, 64-bit (Intel or AMD processor) |
| macOS | macOS 12.3 or later on Apple Silicon (M1 or newer). Intel Macs are not supported, because current PyTorch builds no longer run on them. |
| Linux | 64-bit Intel or AMD, or ARM64 (including the NVIDIA GB10 in a DGX Spark). The app's window needs WebKitGTK 4.1, which the .deb and .rpm packages install for you. |
A GPU is optional. Setup finds the one you have and installs the matching engine:
| Your hardware | Models run on |
|---|---|
| NVIDIA GPU (GeForce, RTX, GB10, data-centre cards) | CUDA 12.6, 12.8 or 13.0, chosen from your driver |
| Mac with Apple Silicon | the Apple GPU, through Metal |
| Intel Core Ultra or Arc graphics | the Intel GPU (XPU) |
| AMD GPU on Linux | ROCm. Experimental: some models may not load. |
| Anything else | the processor. Small models answer in about a second; large ones are slow. |
Disk. The engine (a private copy of Python, PyTorch and the model libraries) takes 1.5 GB for the processor, 1.6 GB on a Mac, 3 GB for an Intel GPU and about 4.5 GB for NVIDIA or AMD. Each model adds its own download, from 0.6 GB to 24 GB.
Memory. A model uses memory only while it is loaded, and you can eject it at any time. The smallest needs under 1 GB; the largest, Jev-Omni, needs about 26 GB and a GPU.
| Model | Parameters | Memory when loaded | Download | Reads |
|---|---|---|---|---|
| Julia 1 | 144M | 0.8 GB | 0.6 GB | text |
| Laya Multilingual | 322M | 1.0 GB | 0.7 GB | text |
| Laya | 421M | 1.2 GB | 0.8 GB | text |
| Laya Typed-Decisions | 421M | 1.2 GB | 0.8 GB | text |
| Kev 0.5B | 0.5B | 1.3 GB | 1.1 GB | text |
| GLiNER2.5 Decide | 340M | 2.0 GB | 2.0 GB | text |
| Kev 4B | 4B | 9.5 GB | 9.5 GB | text |
| Lev | 4B | 9.5 GB | 9.6 GB | text |
| Intern-Decision 4B | 4B | 10 GB | 9.1 GB | text, images |
| CLM 8B | 8B | 17 GB | 16.5 GB | text |
| Jev-Omni | 12B | 26 GB | 24 GB | text, images, audio, video |
You do not need all of them. One small model, such as Laya, is enough to try everything in this documentation. Models explains what each one is good at.
Install with one command#
The one-line installers fetch the latest release, install it in the usual place for your system and open the app. They also avoid the warnings that macOS and Windows show for apps downloaded through a browser.
Run the command in PowerShell. It installs the app for your user only (no administrator rights are needed), adds it to the Start menu and opens it.
Run the command in Terminal. It copies the app into /Applications (or ~/Applications if you cannot write to /Applications) and opens it.
Run the command in a terminal. It installs the .deb package with apt, or the .rpm package with dnf or zypper, and asks for your password once. Without a package manager or sudo, it installs the AppImage for your user into ~/.local/bin. Either way the app appears in your applications menu.
Two options go after sh -s --: --appimage never uses sudo, and --version v0.3.0 installs a specific release.
irm https://raw.githubusercontent.com/BudEcosystem/Bud-Decision-Engine/main/get.ps1 | iexcurl -fsSL https://raw.githubusercontent.com/BudEcosystem/Bud-Decision-Engine/main/get.sh | shcurl -fsSL https://raw.githubusercontent.com/BudEcosystem/Bud-Decision-Engine/main/get.sh | sh# the AppImage for your user only, never sudocurl -fsSL https://raw.githubusercontent.com/BudEcosystem/Bud-Decision-Engine/main/get.sh | sh -s -- --appimageDownload the installer yourself#
Every release is on the releases page. For version 0.3.0:
| File | Size |
|---|---|
Bud. |
15.1 MB |
Bud. |
22.0 MB |
Run either one. The app is added to the Start menu. The installers are not signed yet, so Windows SmartScreen may warn you: choose More info, then Run anyway.
| File | Size |
|---|---|
Bud. |
21.2 MB |
Open the disk image and drag Bud Decision Studio into Applications. The app is not notarised yet, so the first time, right-click it and choose Open. If you start it from the disk image or your Downloads folder, setup offers to move it to Applications first.
| Your system | File | Install with |
|---|---|---|
| Ubuntu, Debian | Bud. or _arm64.deb |
sudo apt install ./ |
| Fedora, openSUSE | Bud. or .aarch64.rpm |
sudo dnf install ./ |
| Any other distribution | Bud. or _aarch64.AppImage |
chmod +x Bud*.AppImage, then open it |
Use the arm64 or aarch64 file on ARM computers such as the NVIDIA GB10. The AppImage adds itself to your applications menu the first time it runs.
The first launch#
The first time the app opens, it walks you through four short screens. Later launches go straight to the studio.
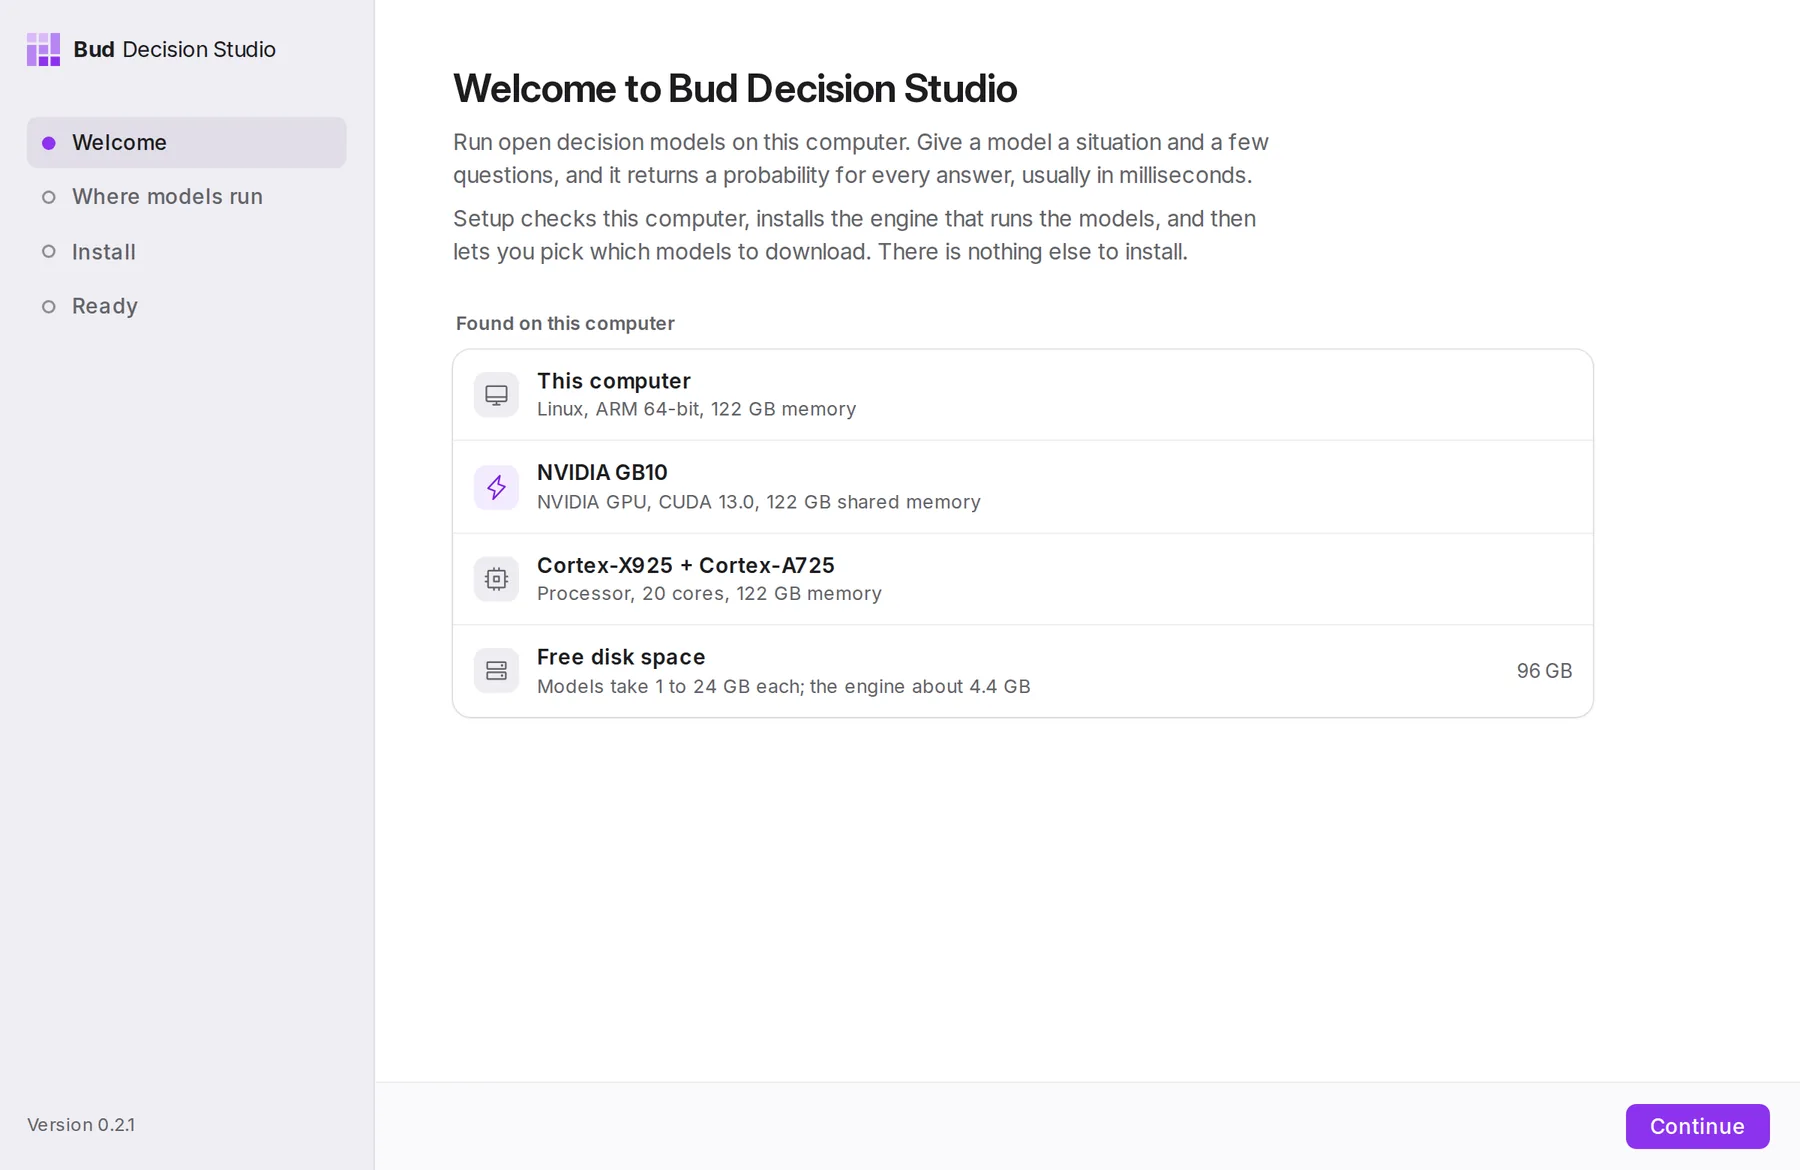
1. It checks your computer#
Setup lists your system, its graphics and processor, how much memory each has, and the free disk space. Choose Continue.
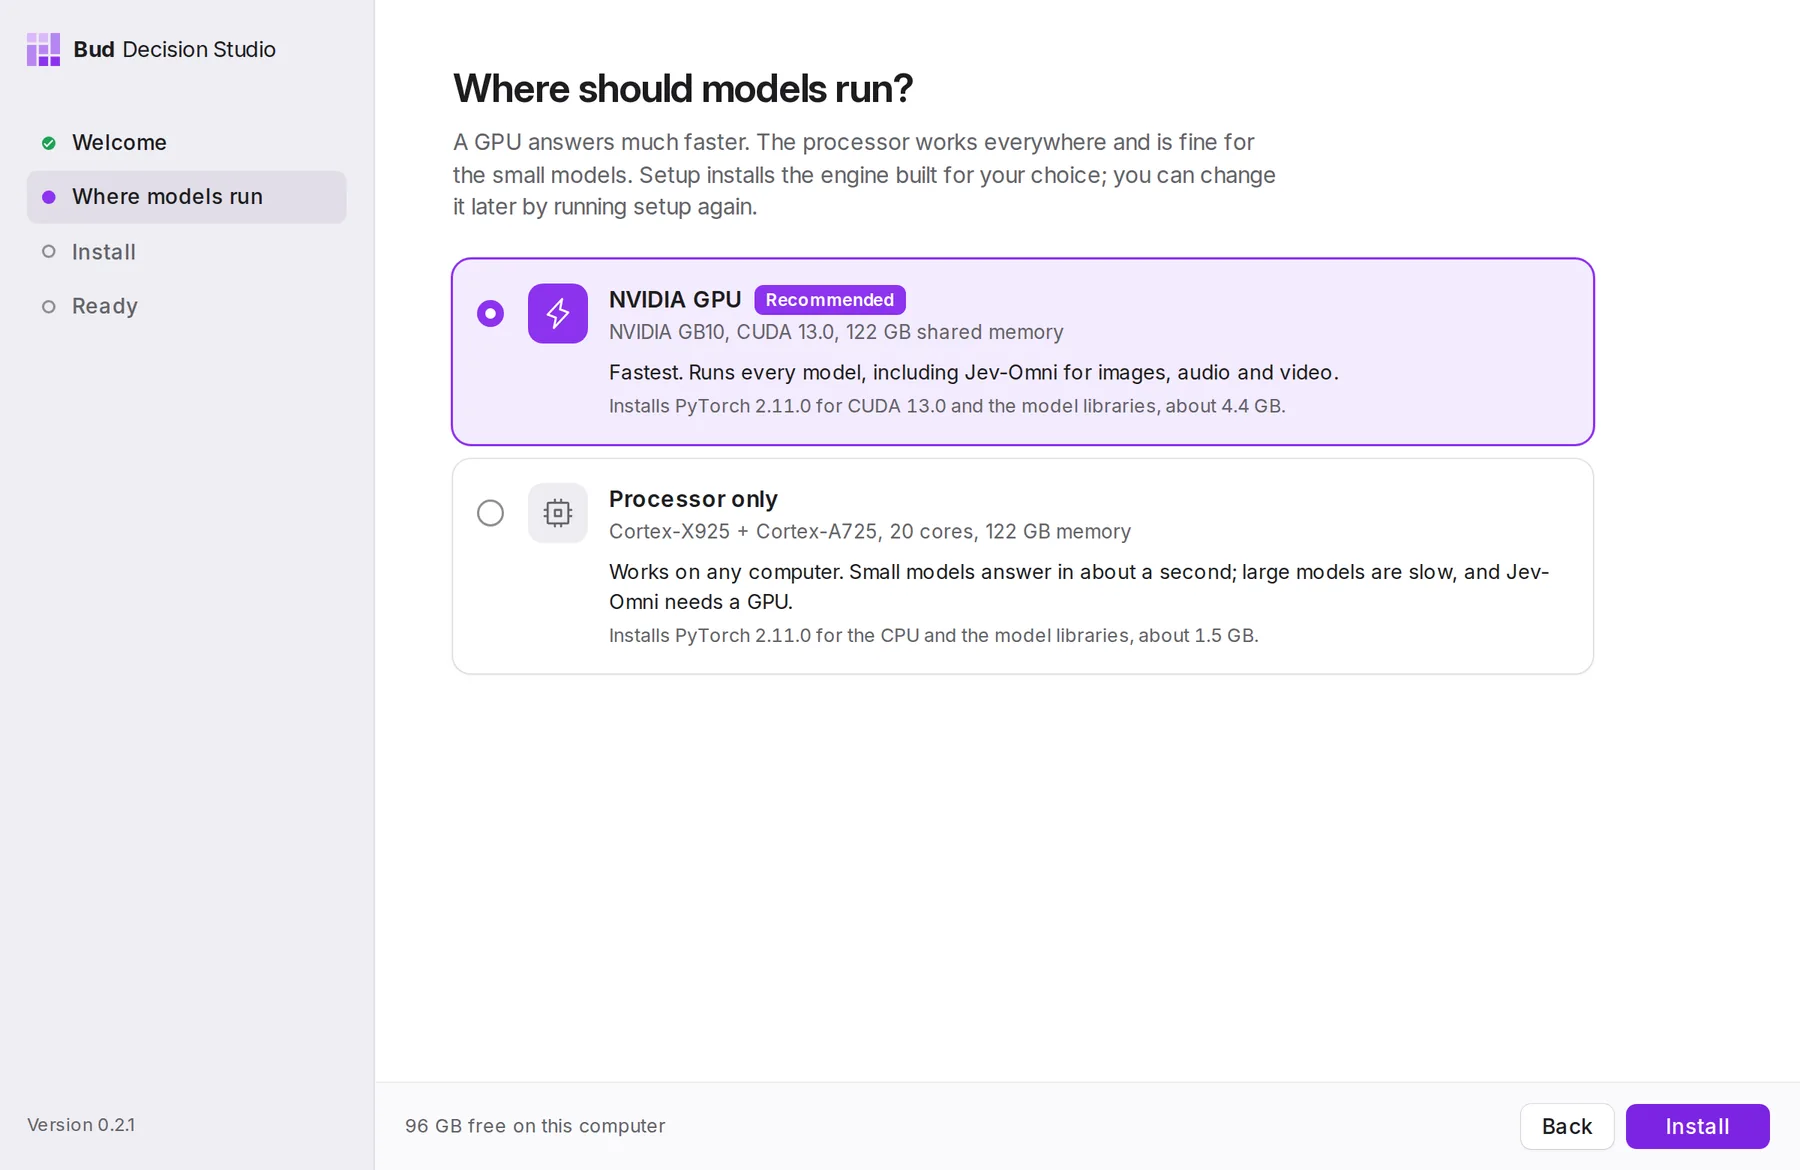
2. You choose where models run#
The recommended choice is selected: the GPU when there is one. Each choice says how fast it is and how much it downloads. Choose Install.
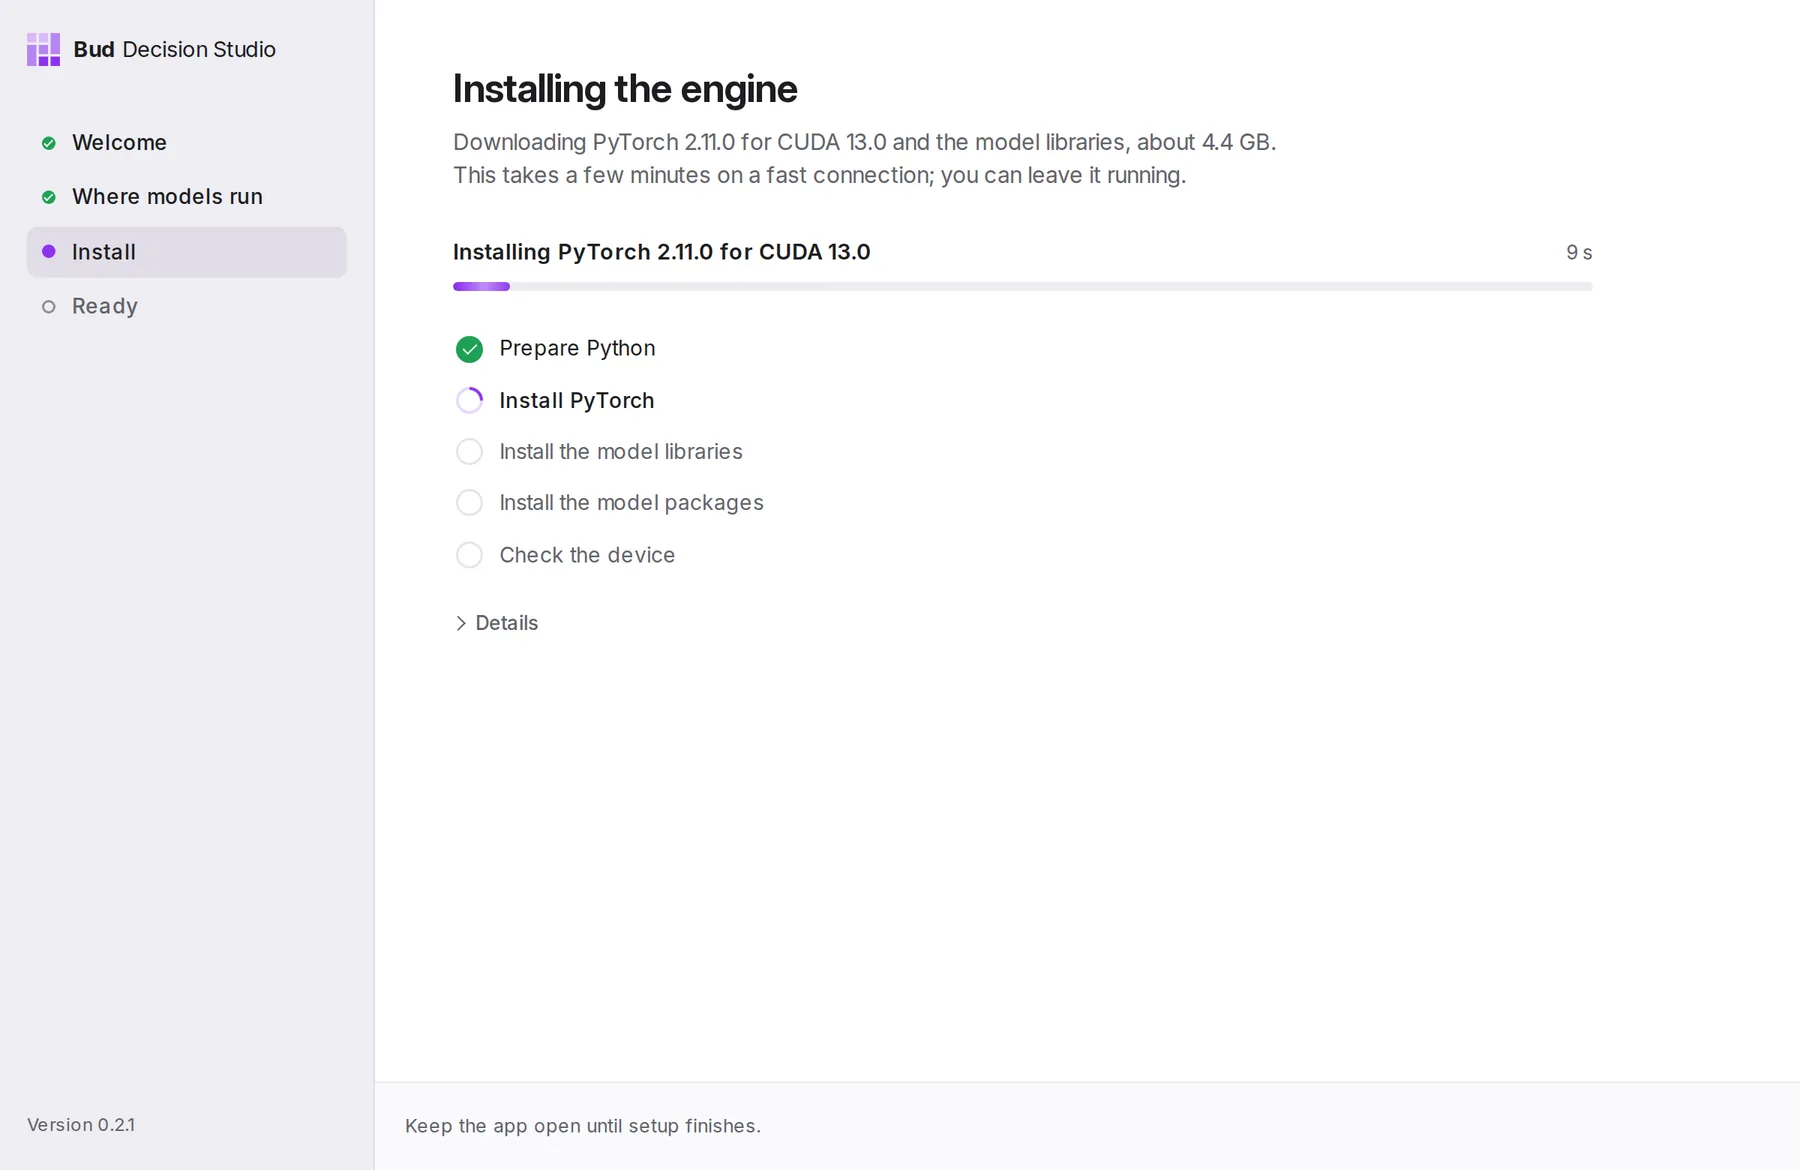
3. It installs the engine#
Setup prepares Python, installs the PyTorch build for your choice and the model libraries, then checks that the device works. This takes a few minutes on a fast connection; keep the app open until it finishes. Details shows the full log. If a step fails, Try again starts it again. Setup never changes anything outside the app's own folder.
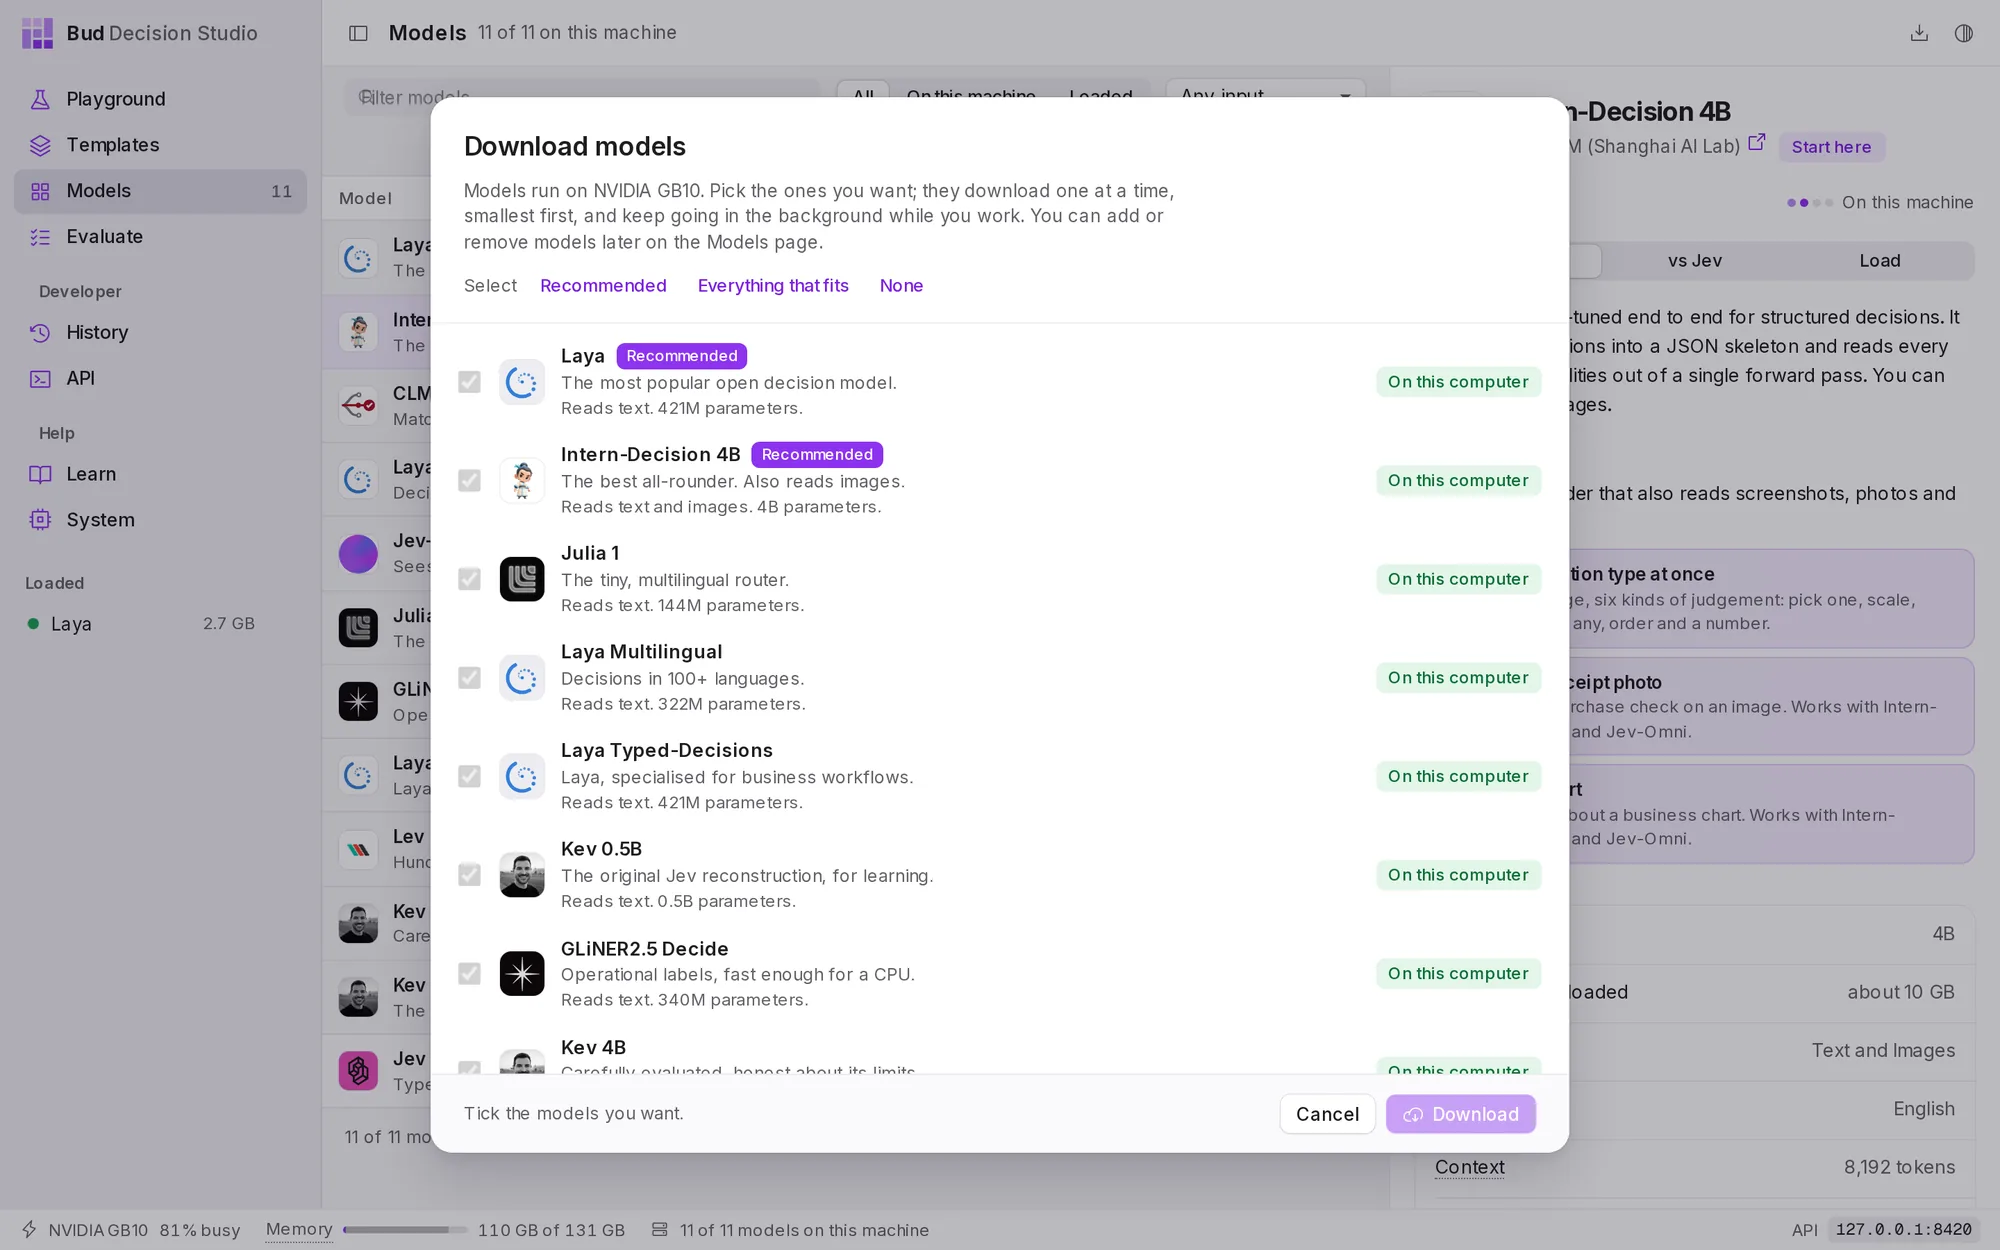
4. You choose which models to download#
When setup is done, choose Open Bud Decision Studio. The studio opens with a list of models, two of them ticked because they suit your computer. Tick the ones you want and choose Download. They download one at a time, smallest first, in the background, so you can start as soon as the first is ready. Not now skips this step; the Models page offers the same list later.
Where your files are#
The app keeps everything it creates in one folder per user:
| Folder | |
|---|---|
| Windows | %APPDATA%\ai. |
| macOS | ~/ |
| Linux | ~/. |
Inside it:
| Path | What it holds |
|---|---|
engine-env/ |
the engine: Python, PyTorch and the model libraries |
data/studio.db |
History, templates and their versions, test examples and settings, in one SQLite database |
data/blobs/, data/uploads/ |
files you attached to decisions (images, audio, video) |
data/config.json |
where models run (the choice you made in setup) |
data/secret |
the key used to fingerprint variables marked sensitive; keep it with the database |
data/backups/ |
a copy of the database made before each upgrade changes it; the three most recent are kept |
logs/studio.log |
the studio server's log |
The models themselves are not in this folder. They stay in the standard Hugging Face cache (~/.cache/huggingface/hub, or C:\Users\<you>\. on Windows), so other tools on your computer can share them. It follows Hugging Face's own settings, such as the HF_HOME environment variable, and the Models page shows the folder in use.
The studio serves its API at http://127.0.0.1:8420. If that port is taken, it uses the first free port from 8421 to 8440 and keeps it for later launches. The API page always shows the address in use.
Updating#
Install the new version the same way you installed the first one: run the one-line command again, or install the new file over the old one. Your engine, models, templates and History stay where they are, and setup does not run again.
When a new version changes the History database, the studio copies the database to data/backups/ before it upgrades it. A database written by a newer version than the one you are running opens read-only, so nothing is lost if you go back to an older version.
To change where models run (for example, after adding a GPU), open the System page and choose Run setup again.
Uninstalling#
Open Settings, then Apps, find Bud Decision Studio and choose Uninstall.
Quit the app and drag it from Applications to the Trash.
Remove the package you installed. For the AppImage, delete the file and its menu entry.
Removing the app leaves your data and models in place, so a reinstall picks up where you left off. To remove them too:
- Delete the app's data folder (see Where your files are). This removes the engine, History, templates and settings.
- Delete models from the Models page before uninstalling (select a model, open its Load tab and choose Delete files), or delete their folders from the Hugging Face cache. Other tools that share the cache may be using the same files.
sudo apt remove bud-decision-studio # Ubuntu, Debiansudo dnf remove bud-decision-studio # Fedora# the AppImage, or wherever you kept it, and its menu entryrm ~/.local/bin/bud-decision-studio.AppImagerm ~/.local/share/applications/bud-decision-studio.desktopRunning from source instead#
Developers can run the studio from a checkout of the repository, without the desktop app:
install.sh detects your hardware, asks where models run and installs everything into .venv, exactly as setup does in the app. A source checkout keeps its data in ./data instead of the app's folder. Run from source has the details.
git clone https://github.com/BudEcosystem/Bud-Decision-Engine.git && cd Bud-Decision-Engine./install.sh # Windows: powershell -ExecutionPolicy Bypass -File install.ps1./run.sh # then open http://127.0.0.1:8420